How to test a starter solenoid
If you want to test a starter solenoid, get a multimeter, a screwdriver, and a test light. These are the tools that most experts use. You will check resistance and continuity with the multimeter. Then, use the screwdriver to see if the solenoid makes a clicking sound. Test lights help you find voltage problems quickly.
Always disconnect your battery before you work on the starter solenoid. This helps you avoid shocks or damage.
Starter solenoids can last up to 15 years if used normally. But sometimes they fail sooner because of worn contacts, rust, or wiring problems.
Key Takeaways
-
Always unhook the battery and put on safety gear before you test a starter solenoid. This helps you avoid shocks and getting hurt.
-
Use a multimeter and a test light to check voltage, resistance, and continuity. This helps you find out if the solenoid works right.
-
Find the starter solenoid by carefully following the cables from the battery. Look in your vehicle’s manual to see the exact spot.
-
Listen for loud clicks and look for steady voltage when you test. If you hear weak sounds or see big drops in voltage, the solenoid may be bad.
-
If your tests show problems, change the solenoid or get help from a pro. Ask for help if you are not sure or do not have the right tools.
Safety and Tools
Safety Steps
Before you start testing a starter solenoid, you need to keep yourself safe. Working with car batteries and electrical parts can be risky if you skip safety steps. Here’s what you should do every time:
-
Park your car on a flat surface and set the parking brake.
-
Turn off the engine and take the key out of the ignition.
-
Disconnect the negative battery terminal. This stops any power from reaching the starter solenoid and keeps you safe from shocks.
-
Wait a few minutes after disconnecting the battery. This lets the electrical system discharge.
-
Put on insulated gloves to protect your hands from electrical shock.
-
Wear safety glasses or goggles to shield your eyes from sparks or debris.
-
Use tools with insulated handles, like screwdrivers or pliers, when working near the starter solenoid.
-
Keep your hands and body away from moving parts while testing.
-
Work in a space with good airflow.
-
If you feel unsure about any step, ask a professional for help.
Tip: Always double-check that the battery is disconnected before you touch any wires or terminals.
Tools Needed
You don’t need a lot of fancy gear to test a starter solenoid, but having the right tools makes the job easier and safer. Here’s a list of what you should gather:
-
Multimeter (for checking voltage and continuity)
-
Test light (helps you spot voltage problems fast)
-
Insulated screwdriver (for jump tests)
-
Insulated gloves and safety glasses
-
Wrenches or socket set (for removing battery cables or solenoid bolts)
-
Shop rag or towel (to clean around the starter solenoid)
If you use these tools and follow the safety steps, you can test a starter solenoid with confidence. You’ll also lower your risk of injury or damage to your car.
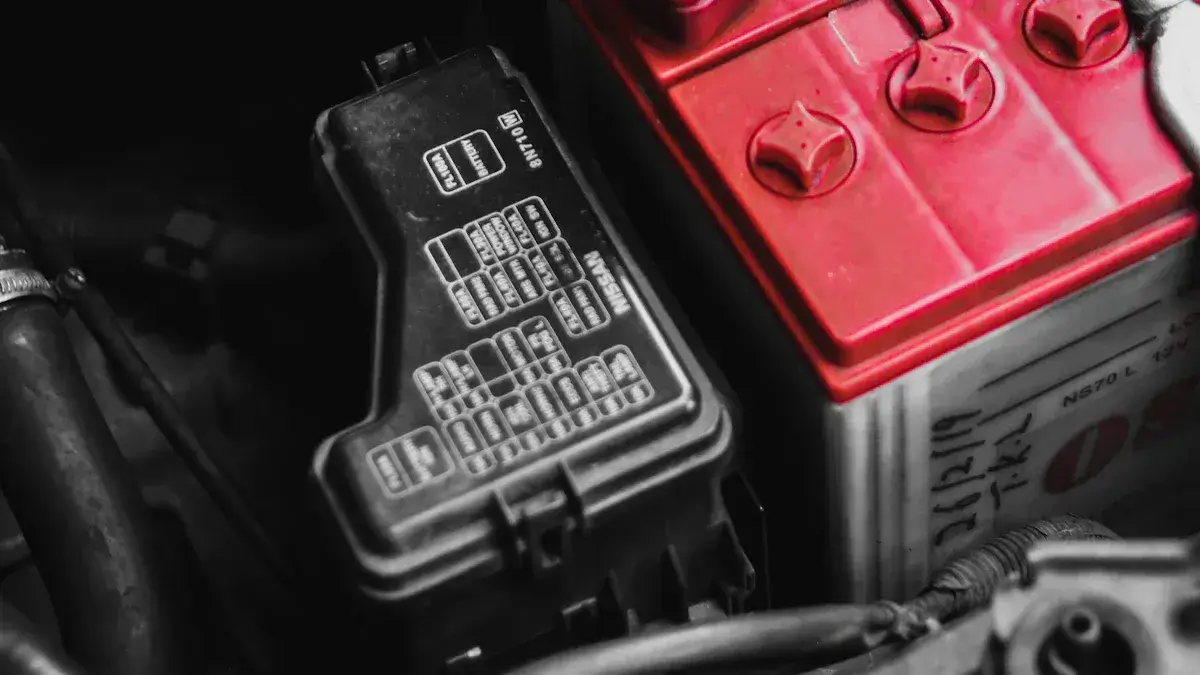
Locate the Starter Solenoid
Finding the Solenoid
Locating the starter solenoid can feel tricky if you have never done it before. The spot where you find it depends on your car’s make and model. Most of the time, you will see it in the engine compartment, usually near the bottom of the engine. Sometimes, you will spot it mounted right on the starter motor. Other times, it sits on the fender well, close to the battery.
Here are some ways to make locating the starter solenoid easier:
-
Check your vehicle’s service manual for the exact location.
-
Look for a small cylinder with wires attached, often near the starter motor.
-
Search along the fender well if you do not see it on the starter.
-
Follow the thick cable from the battery; it usually leads straight to the solenoid.
Tip: Always follow safety steps when working around the solenoid. Double-check that the battery is disconnected before you start.
Access Tips
Getting to the starter solenoid can be easy or tough, depending on your car. In rear-wheel drive vehicles, you usually have more space in the engine bay. The starter motor and solenoid are easier to reach because the engine sits lengthwise. In front-wheel drive cars, the engine sits sideways. This puts the starter solenoid in a tight spot between the engine and the firewall, making it harder to reach.
Try these tips for better access:
-
Use a flashlight to see into dark or hidden areas.
-
Remove any covers or air intake parts that block your view.
-
Wear gloves to protect your hands from sharp edges.
-
If you cannot reach the solenoid from above, try looking from underneath the car. Make sure the car is secure before crawling under.
Locating the starter solenoid takes patience, but these steps will help you find it safely and quickly.
Test a Starter Solenoid
Testing a starter solenoid might sound tricky, but you can do it with a few simple tools and some patience. Let’s walk through the most common ways to check if your starter solenoid is working right.
Multimeter Test
A multimeter gives you the most accurate results when you want to test a starter solenoid. Here’s how you can do it:
-
Make sure your car is parked, the engine is off, and the key is out of the ignition.
-
Find the starter solenoid. It usually sits on the starter motor or the fender well.
-
Set your multimeter to the lowest resistance (ohms) setting.
-
Disconnect the wires from the solenoid to isolate it.
-
Place the multimeter probes on the two small terminals (often marked “S” and “I” or “S” and “M”). You should see a resistance reading. Compare this number to your car’s service manual.
-
Next, put one probe on the battery terminal and the other on the starter terminal. Check the resistance again and compare it to the manual.
-
Switch your multimeter to continuity mode. Touch the probes to the battery and starter terminals. If you hear a beep or see a continuity signal, the solenoid is working.
Tip: Always check for loose wires or corroded contacts before you start. Clean any rust or dirt for a better connection.
Common mistakes to avoid:
-
Not securing wiring connections
-
Ignoring dirty or corroded contacts
-
Forgetting to check the ground connection
-
Rushing and not waiting for stable readings
If you get no reading or the numbers are way off, your starter solenoid could be faulty. Always double-check your results and clean the terminals before making a final call.
Test Light Method
The test light method is quick and easy. It helps you with checking for current, but it doesn’t give you exact numbers like a multimeter.
-
Clip the test light’s ground wire to a clean metal part of the car.
-
Touch the probe to the solenoid’s output terminal.
-
Have someone turn the ignition key to “start.”
If the test light glows, you know current is flowing through the solenoid. If it stays dark, there’s a problem—maybe a bad connection or a faulty solenoid.
Note: The test light only shows if power is present. For more details, use a multimeter.
Voltage Drop Test
A voltage drop test helps you find hidden resistance in the starter circuit. Too much resistance means your starter solenoid or cables might be bad.
-
Set your multimeter to DC volts.
-
Place the red lead on the battery positive terminal and the black lead on the starter solenoid’s positive terminal.
-
Have someone turn the key to “start” while you watch the meter.
-
Write down the voltage drop.
Check the results with this table:
| Circuit Location | Voltage Drop Threshold (Volts) | What It Means |
|---|---|---|
| Battery to starter terminal | > 0.5 V | Too much resistance; possible bad solenoid or cables |
| Battery cable connection | > 0 V | Faulty cable connection |
| Battery cable (itself) | > 0.2 V | Excessive resistance in cable |
| Starter solenoid | > 0.3 V | Faulty starter solenoid |
| Starter housing to battery negative | > 0.2 V | Poor ground or loose connection |

If you see a voltage drop higher than these numbers, you may have a bad starter solenoid or a wiring issue.
Screwdriver Jump Test
This old-school trick helps you figure out if the solenoid is engaging. You’ll need an insulated screwdriver.
-
Make sure the car is in park or neutral and the parking brake is on.
-
Disconnect the battery, then find the solenoid terminals.
-
Reconnect the battery.
-
Use the screwdriver to bridge the two large terminals on the solenoid.
-
Watch and listen. A good starter solenoid will make a strong click and the starter motor should spin.
If you hear nothing or just a weak click, the solenoid might be bad. If you hear a strong click and the engine cranks, the solenoid is likely good.
Warning: This test creates sparks. Wear gloves and safety glasses. Only use this method if you feel comfortable working around car batteries.
Direct Voltage Application
This method lets you see if the solenoid works when you apply power directly. It’s a good way to finish your diagnosis.
-
Put the car in park or neutral and set the handbrake.
-
Disconnect the negative battery terminal.
-
Inspect the solenoid for damage or loose wires.
-
Reconnect the battery.
-
Set your multimeter to DC voltage. Have a helper turn the key to “start.” Measure voltage at the solenoid’s input terminal. You should see about 12.6 volts.
-
Check the output terminal the same way. It should also read close to battery voltage.
-
Disconnect the battery again.
-
Use the multimeter’s continuity mode to check between the input and output terminals. You should see continuity only when the solenoid is activated.
-
For a bench test, remove the solenoid and apply 12 volts directly to the input terminal. The solenoid should click and move the piston.
If you don’t see the right voltage or the solenoid doesn’t click, it’s time to replace it.
Tip: Always reconnect the battery only when you’re ready to test. Never touch the terminals with bare hands.
What to Look For
When you test a starter solenoid, you want to see strong clicks, steady voltage, and good continuity. If you notice weak sounds, no movement, or big voltage drops, the solenoid could be faulty. Sometimes, you might see error codes like P1600, P0606, or P0620 on a scan tool. These codes can point to starter circuit or solenoid problems.
Remember, checking for current with both a test light and a multimeter gives you a full picture. The test light shows if power is present, while the multimeter tells you if the numbers match what your car needs.
Results and Next Steps
Interpreting Results
You’ve finished your tests, but what do the results mean? Here’s how you can make sense of what you found:
-
Use your multimeter to check resistance. A normal reading falls between 0.4 and 2 Ohms. If your number is outside this range, the solenoid may be faulty.
-
Check for 12 volts at the solenoid terminals when you turn the key. No voltage means a wiring or ignition problem.
-
Listen for sounds. No click means the solenoid isn’t working. A single click with no engine start points to engagement trouble. Slow cranking means the solenoid isn’t delivering enough power. If the starter keeps running after the engine starts, the solenoid might be stuck.
-
Always compare your readings to your vehicle’s service manual. Some cars have special requirements.
If you’re not sure about your results, double-check your connections and try again. Sometimes a loose wire or dirty terminal can throw off your numbers.
If the Solenoid Is Bad
If your tests show the solenoid is bad, you have a few options:
-
Replace the solenoid with a new one. This is the most common fix.
-
Buy a rebuilt starter unit if your starter is old or worn out.
-
Try repairing the solenoid yourself if you feel confident and have the right tools.
-
Take the faulty part to a recycling center. Separate the metal parts like copper and steel before dropping them off.
Most repairs are simple and need only basic hand tools. If your starter is very old, replacing the whole unit might save you time and trouble.
When to Get Help
Sometimes, it’s best to call a pro. You should get help if:
-
You feel nervous about working with electrical parts.
-
You don’t have the right tools or can’t figure out the problem.
-
You hear grinding or constant clicking when you turn the key.
-
The starter keeps running after the engine starts.
-
The car still won’t start, even with a good battery.
-
You see oil leaks or damaged wires near the starter.
Here’s a quick look at the costs:
| Aspect | Professional Service | DIY Approach |
|---|---|---|
| Parts | $75 – $400+ | $50 – $400+ |
| Labor | $100 – $600+ | $0 |
| Tools | Included | $20 – $100+ |
| Total Cost | $250 – $1,000+ | $70 – $500+ |
| Warranty | Yes | Maybe not |
If your car is under warranty, check the terms before you start repairs. DIY work can sometimes affect coverage, especially on newer vehicles.
You can check your solenoid safely if you do these things: First, put on gloves and safety glasses. Next, find the solenoid and look for its terminals. Then, use a test light or a multimeter to see if there is power and if the circuit is complete. Always make sure the ignition is off before you unplug anything.
If your car still does not start, look at the battery, cables, starter motor, and ignition switch. Sometimes, the problem is just a loose wire or a weak battery.
Check your results again. If you are not sure, get help from a professional.
FAQ
How do I know if my solenoid is bad or if it’s the battery?
You can check the battery first. Try turning on your headlights. If they work, your battery has power. If the car still won’t start, the solenoid or starter might be the problem.
Can I drive with a faulty solenoid?
No, you can’t. A bad solenoid can stop your car from starting. If your car won’t start, you need to fix the problem before you drive again.
What causes a solenoid to fail?
Rust, worn contacts, or loose wires can cause problems. Sometimes, water or dirt gets inside and damages the parts. Old age can also make the solenoid stop working.
Do I need special tools to test a solenoid?
You don’t need fancy tools. A multimeter, a test light, and an insulated screwdriver work for most tests. You can find these at any auto parts store.
Can I replace a solenoid myself?
Yes, you can. If you follow safety steps and use the right tools, you can change it at home. Always check your car’s manual for details.
Written by Jack Elliott from AIChipLink.
AIChipLink, one of the fastest-growing global independent electronic components distributors in the world, offers millions of products from thousands of manufacturers, and many of our in-stock parts is available to ship same day.
We mainly source and distribute integrated circuit (IC) products of brands such as Broadcom, Microchip, Texas Instruments, Infineon, NXP, Analog Devices, Qualcomm, Intel, etc., which are widely used in communication & network, telecom, industrial control, new energy and automotive electronics.
Empowered by AI, Linked to the Future. Get started on AIChipLink.com and submit your RFQ online today!


